This post may contain affiliate links. Please read our disclosure policy.
Several years ago, our family decided to purchase a vacation house on Hilton Head Island, South Carolina. While there are many pros and cons to owning property away from home, one initial pro is putting your own touches on your new place! Thank you to our partner, Beautifully Responsible, for inspiring today’s post.
We were open to a ‘fixer-upper’ to some extent. Nothing too major since we would have a four-hour drive if we wanted to check on the progress, but enough that the sweat equity would pay off.
I love to organize, plan and decorate. Plus, I knew that between my husband, dad, and brother, we could do a lot of renovation.
We started by finding a house that had enough space for all of us. We have a family of six, plus I knew that my brother’s family of four and my parents would be able to join us for most of our trips. All in all – that meant that we were looking for a place with room for twelve.
After many months, we found a five-bedroom house on a cul-de-sac with a small fenced-in courtyard for the kids (and dogs) to play. It had several sitting rooms for the adults to hang-out, and it had a lot of storage for things like beach towels and toys.
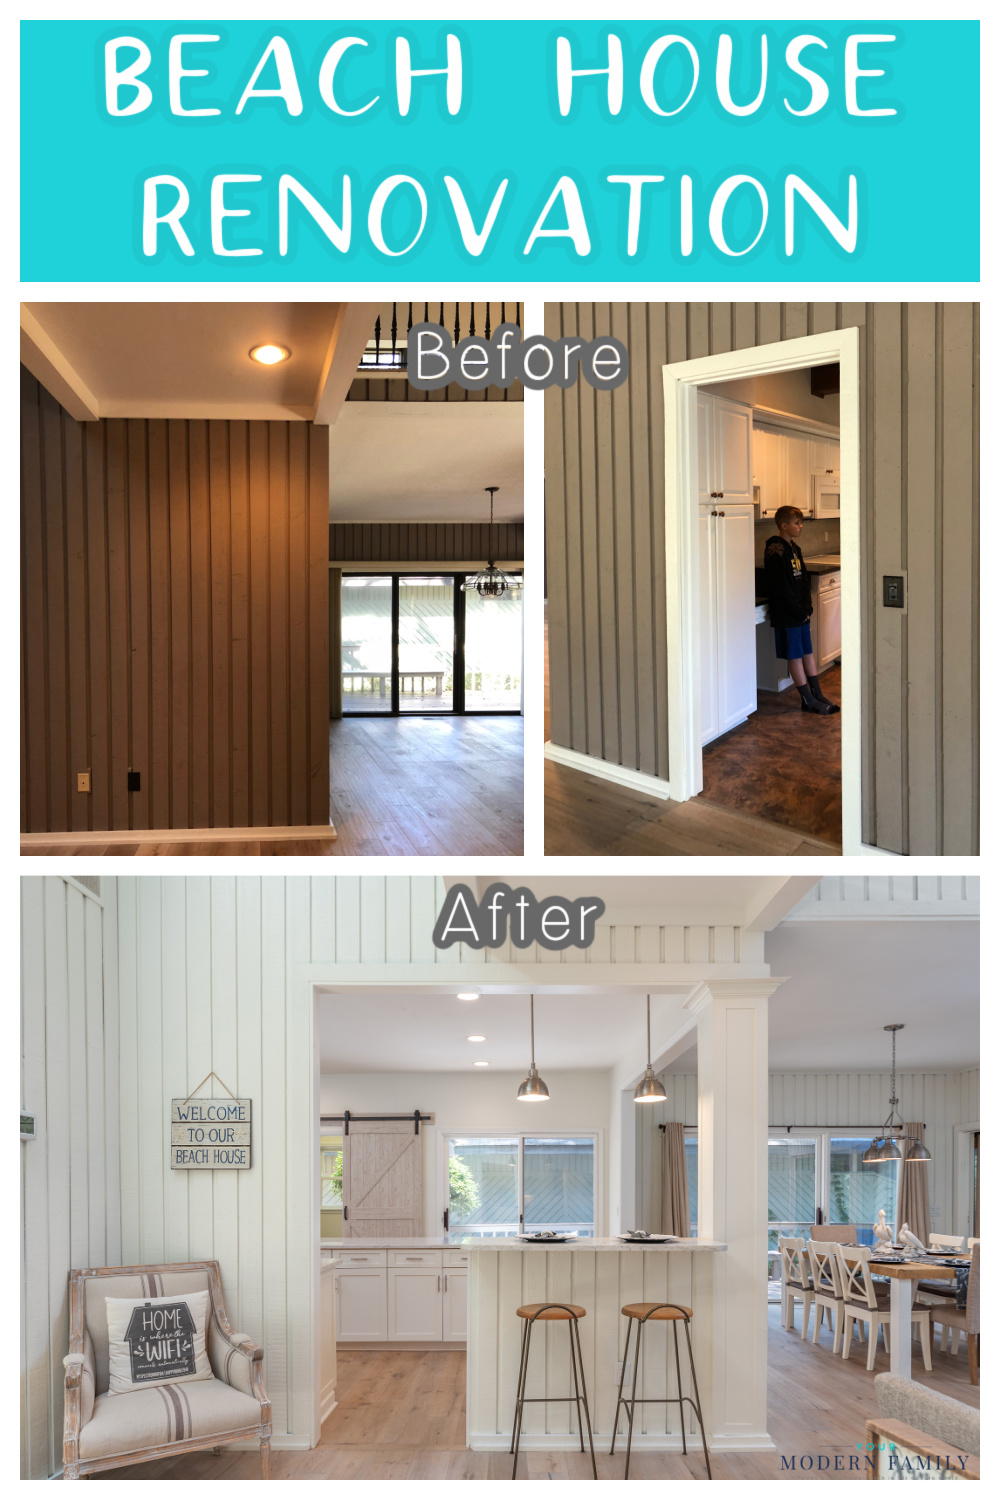
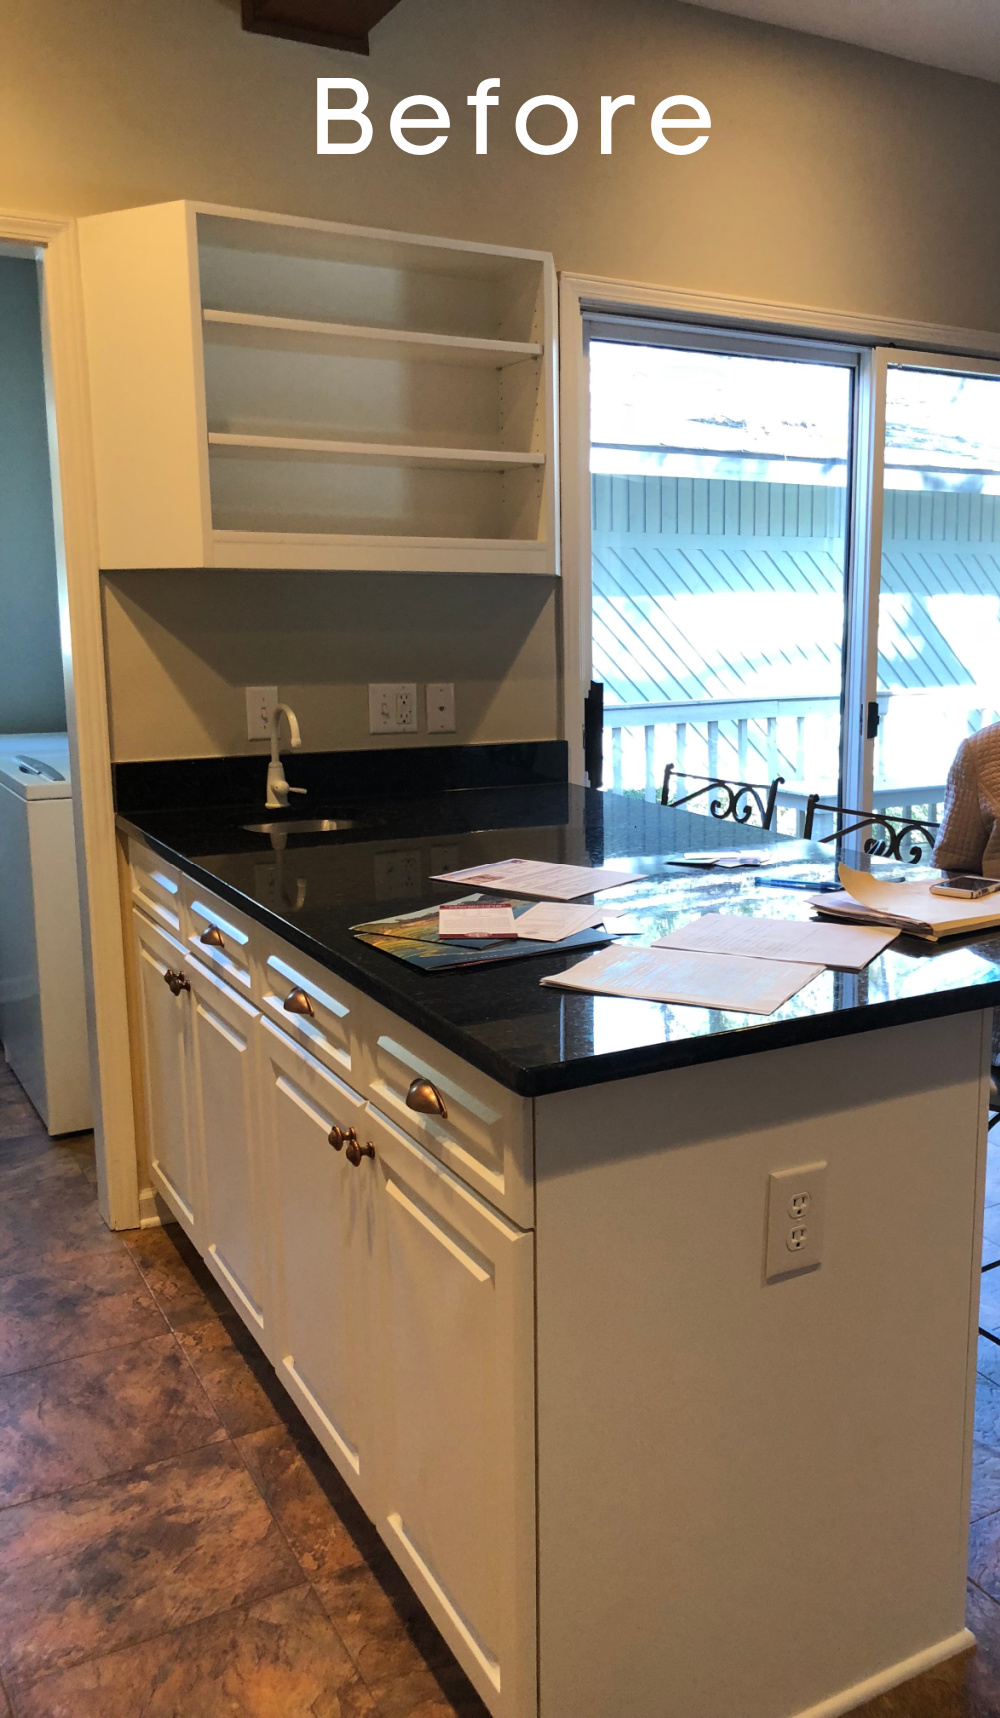
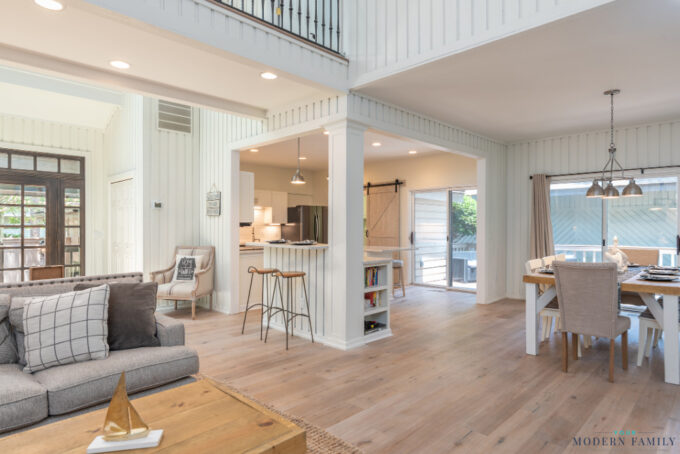
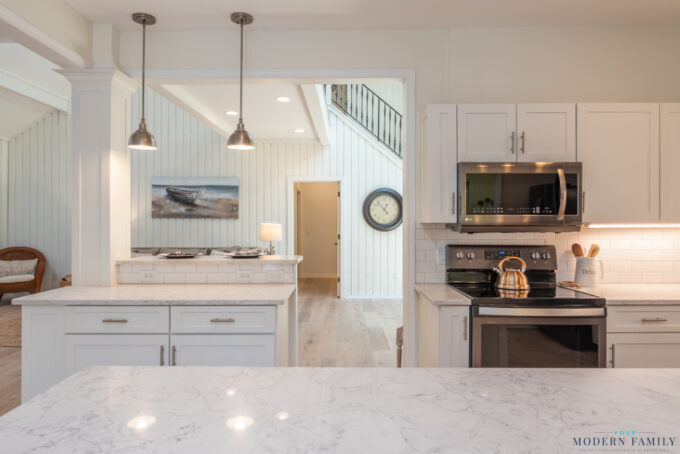
Our first project was taking on the kitchen. The downstairs layout was different than what we were looking for and the kitchen was the heart of it.
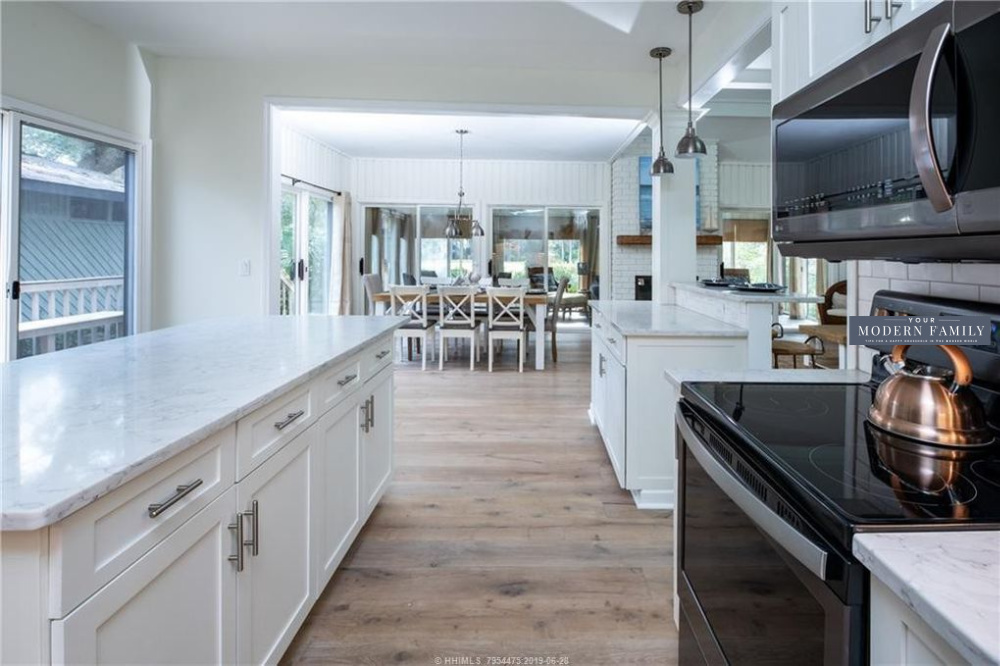
We started by removing two of the kitchen walls and added structural beams for support. We created a more open kitchen to allow the eyes to see the high-ceilings while giving it a more open appearance.
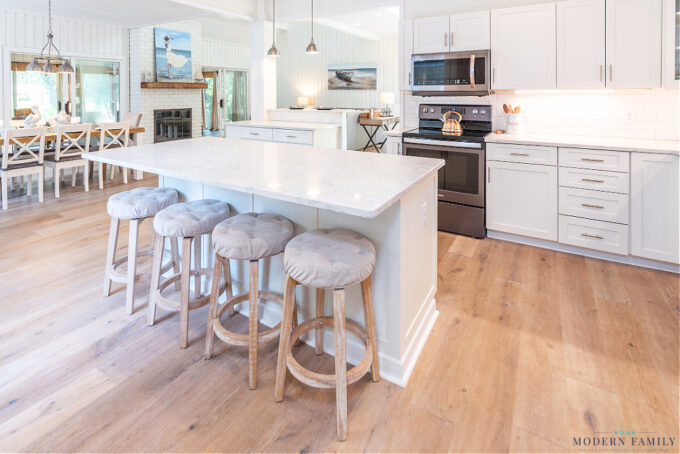
We replaced the island, reconfigured the kitchen layout, removed the faux beams, added a white tiled backsplash, replaced the appliances, replaced the kitchen cabinets with custom-built cabinets, and replaced the flooring.
The flooring was the biggest project. Luckily, the main living space downstairs already had flooring that we liked. It had Resilient flooring. (Resilient flooring is a category of flooring products, just like hardwood or carpet. Resilient flooring gets its name from its ability to “give” under the impact of footsteps and then spring back into shape.)
Our flooring was Beautifully Responsible so we knew that it would hold up because it is made for life, and we loved how these specific floors looked “beachy.” The Beautifully Responsible flooring that we would be extending into the kitchen was a great choice by the previous owners. Mindful Manufacturing at its best: bringing together environmental sustainability, well-being, and durable performance.
We decided to carry the same Beautifully Responsible flooring throughout the rest of the house. We like to use eco-friendly home products that also fit our design and healthy lifestyle, so this was a win-win. The well-being of my family is important, so I try to be mindful of choosing carefully curated products designed with health in mind. It just helps us to live in a cleaner, healthier interior environment.
You can visit BeautifullyResponsible.com to learn more about the flooring that we used. We liked that it was environmentally friendly, versatile, durable, and affordable since we were going to be adding it to many rooms.
We actually looked through their incredible array of styles on the website, but we liked the one that was already in the house the best. We added it to the kitchen, bedrooms, laundry room, powder room, and sunroom.
The kitchen was not an easy room to renovate, but it was the most important to me. We put our sons on the job of tearing up the old flooring. As they began to pull it up, they discovered not one, not two, but three layers of flooring underneath the top layer!
It took them several days to remove the old flooring along with the glue, but when they finished, they were so proud of themselves! I wish that I had captured a picture on that day to try to get the look of pride that they had in their eyes on camera.
We had already ordered the new flooring and it had arrived, so we were ready for installation.
The new floors made such a big difference! We added them to every other space, as well, and immediately loved the look.
Overall, the full house renovation of the house took about 3-4 months.
We did the majority of the renovations ourselves, including adding a bathroom, turning a loft into an enclosed bedroom, giving the downstairs a more open floorplan by removing the walls, painting the entire house, plus many more projects. We also did a lot of work to the outside of the property like new landscaping, walkways, etc.
All in all, the transformation was just what we were hoping it would be and we were so excited about how it all turned out. With my husband and I both working from home, and our kids being on a fairly predictable school schedule, we knew that we were going to spend a lot of time there.
Check out more inspiration on Instagram at @ResponsibleFloors


It looks wonderful! May I ask where your cushy bar stools are from?
Thank you! I got them from Bed, Bath, and Beyond. 🙂