This post may contain affiliate links. Please read our disclosure policy.
Do you want to build a snowman? If I asked Allie this, she’ll break out in song. Her FAVORITE movie is Disney Frozen… as you can see here:

She & her cousin, Lia, dress up on a regular basis to play Anna & Elsa (or even just Elsa)

So, when we decorated the tree (very early this year… after the kids asked for the third time in a weekend), we decided that we needed some Disney Frozen ornaments on the tree. We decided to make Salt Dough Ornaments.

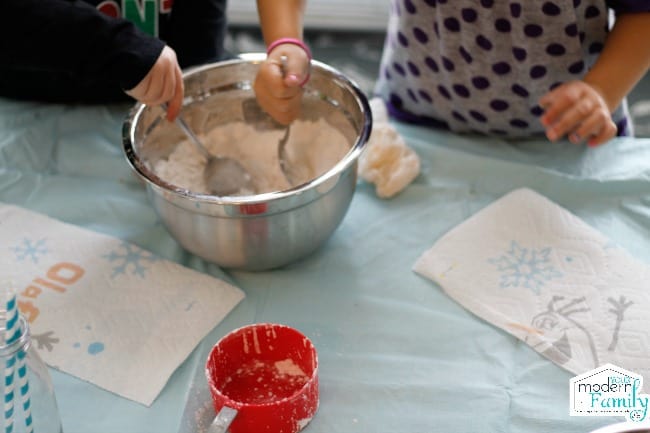
Allie invited her friend Hazel over to make the ornaments with her. We even decorated for the occasion (notice our “icicles” in the background).

Ingredients for Frozen Salt Dought Ornament
-
- 1 cup of salt
- 2 cups flour
- 2 cups of water
- ribbon
- straws (to poke a hole for the ribbon)
- Rolling Pin
- stamper & ink (optional, but that’s how we made ours look Frozen-themed)
Directions for Frozen Salt Dought Ornament
First, you will pour the ingredients into the bowl (pour the water very slowly because it can be too watery, so I did about 1/2 cup at a time and let the girls mix it.
Here are the four steps to get started: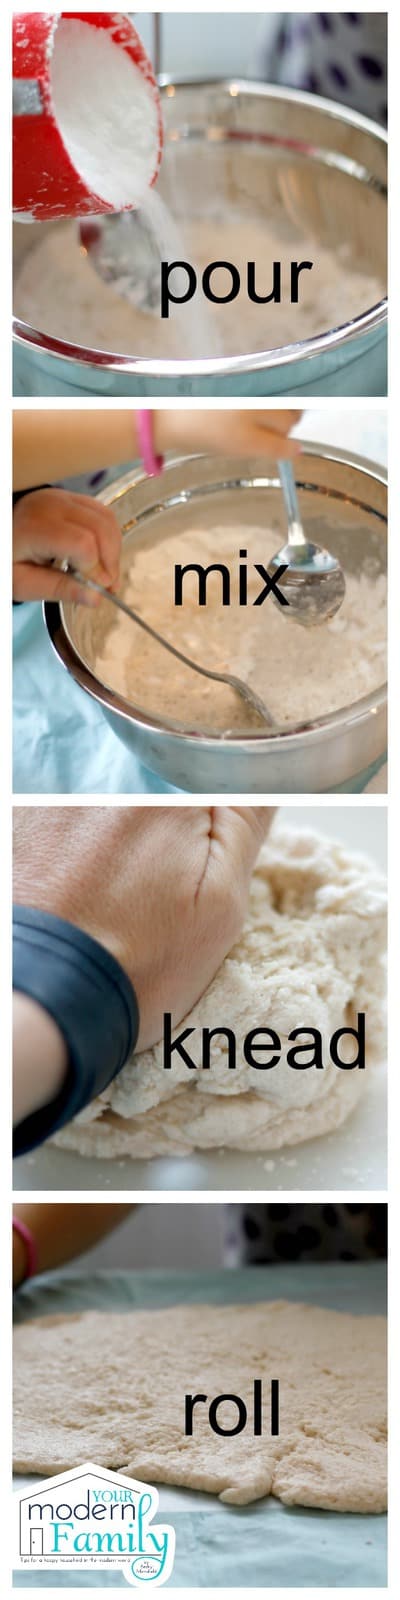
Once you have everything done, cut them into the shape that you like with a cookie cutter.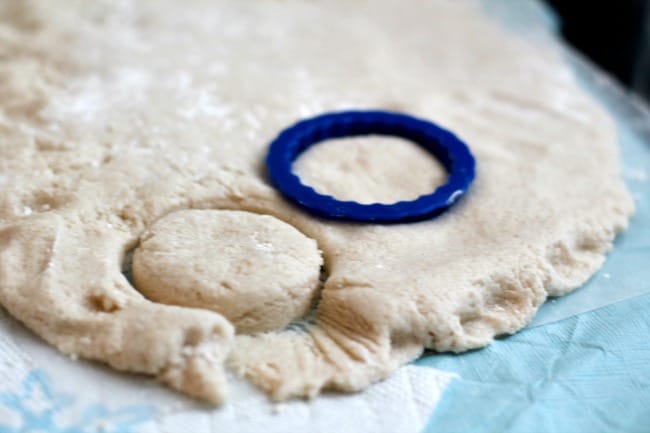
- Let them dry for 2 days, at least. I let mine dry on the cookies sheet for one day and then moved them over to cookie cooling racks for another day, but you can bake them at 200 degrees for about 2-3 hours.
- Before they dry, poke a hole in the top with a straw.

Now, I tried these two ways, so I want to share both ideas.
1- I used the stamp while they were wet, but they didn’t turn out as well.
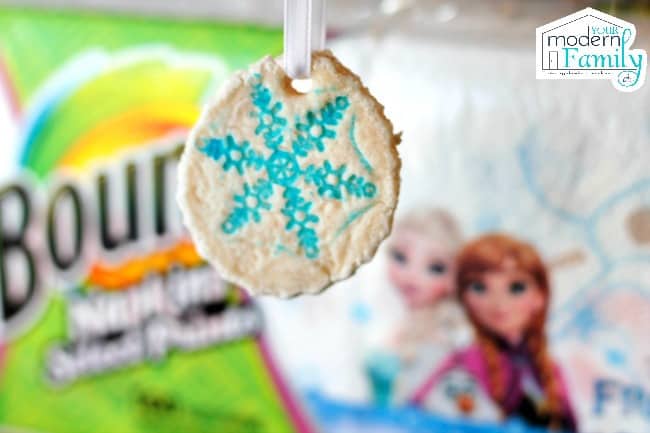
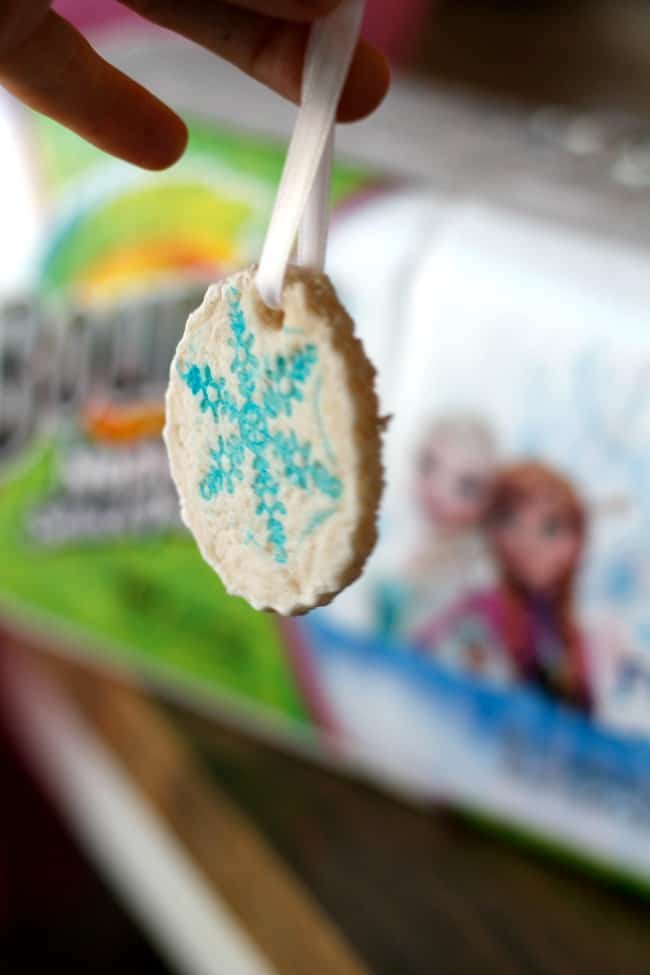
2- I used them stamp again (with ink on it) when they were dry and I liked them much more.
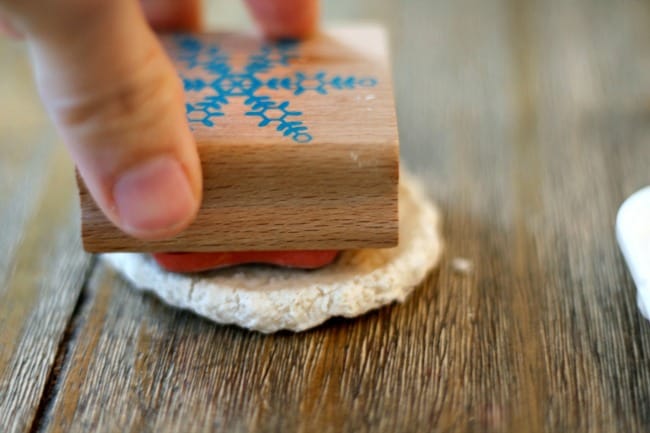
We loved the way that they turned out. (see how much prettier the blue is than the black… but maybe a different black might work)

Add your ribbon to the ornament:
You can even write the name & date on the back.
Be sure to clean up your mess when you are done. If you have any left-over dough, just put it into an airtight container to make more another day. We kept ours for two days before we did it again. 🙂