This post may contain affiliate links. Please read our disclosure policy.
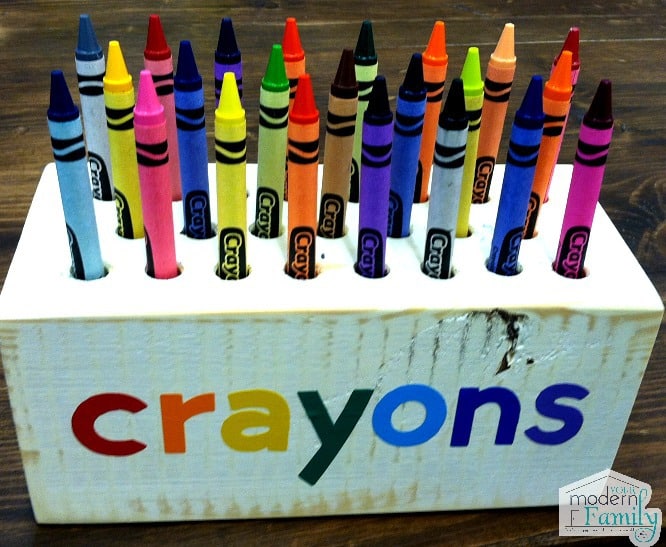
This DIY Crayon Block Holder is so easy because you can make it with scrap wood that you have at your house and it lets you easily create! It will cost you less than a dollar for the wood and then you can add whatever you want- the word CRAYON or someone’s name. 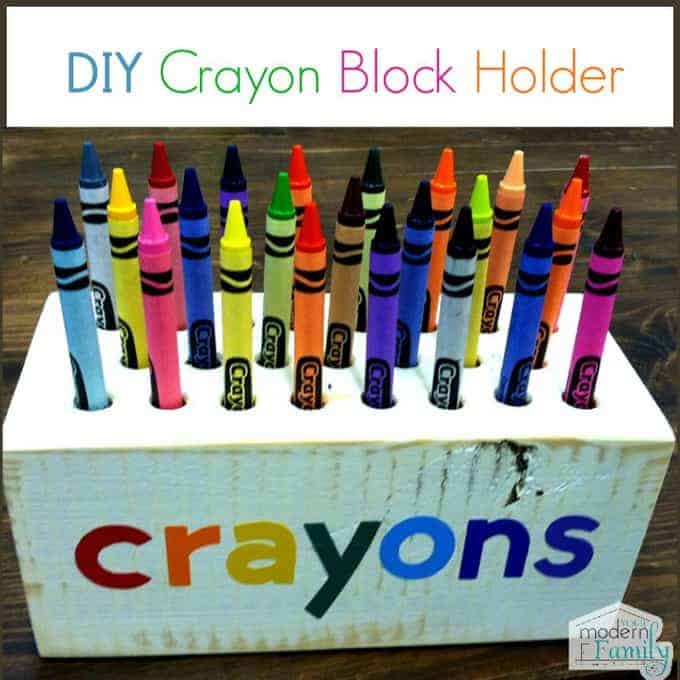
A few things to remember when preparing your wooden block:
1- Stagger and space your crayon holes enough so that little fingers can get in and reach them.
2- You can do this in two ways: With two 2X4 or with three 1X3’s. If you go for the 1X3’s, you will ONLY cut holes in the top 1X3 and the you will glue that onto your second block and glue that one onto your third block (stacking all three, but only having holes in the top one)
The same thing goes for the 2X4’s – you would only drill holes into the top piece.

Here is your list of materials:
- 1×3 boards – you would just ask for 27 inches of this and then make the cuts yourself or have the store cut it. or you can do two 2X4’s and glue them together.
- Wood Glue
- Pencil
- Safety Glasses (if you are going to cut the wood)
- Drill (again- if you cut it)
- Circular Saw (if you cut it)
- White paint
- Sand paper
- Letters (stickers) or stencils and paint if you go that route.
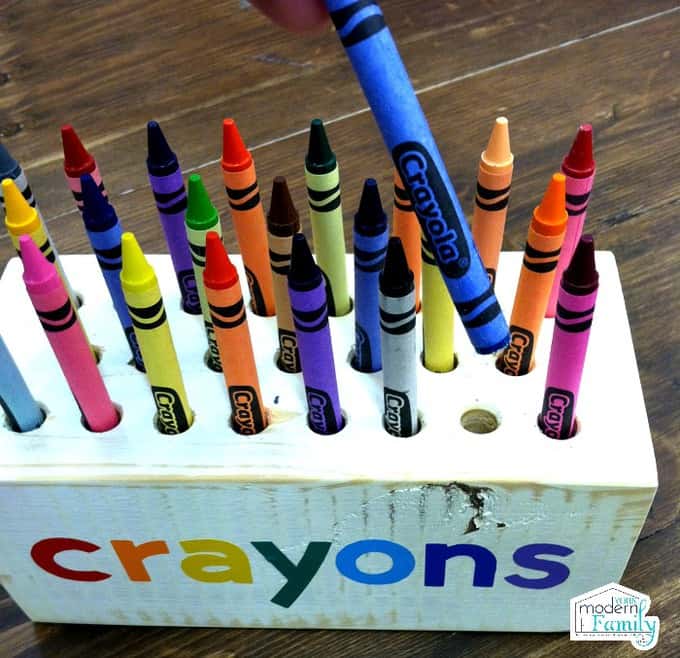
Take your 1X3 piece and drill all of the way through. Stagger them. Take one of the 1×3 pieces and drill holes a bit larger than your crayons (you don’t want it to be too snug of a fit).
If you are using this for markers, instead of crayons, drill through 2 of the blocks instead of just one.
Here is an example:

2. Glue and clamp your pieces together. Let it dry for several hours (until dry).
3. Paint this how you want it. I like the white wash look. Paint it white. Once it dries, use a piece of sandpaper to rough it up a bit around the edges and around the crayon holes (and even all over, for that look.)

4. Once it is dry, vacuum and wipe off sanding residue.
5. Place your stickers on your block.
That’s all there is to it!